Taking a screenshot is one of the simplest feature that the smartphone today has to offer to you. However, the fact remains that though this feature is there on almost all the phones out there but he way you can do it in each phone tends to vary greatly. Such is a case with the models that are provided by Samsung . In the latest models of Samsung, namely, Galaxy S9 and S9+ , there are a plenty of ways to take the screenshots. In this article we are going to focus on every possible way of taking the screenshot. Here are the steps to take screenshot on Samsung Galaxy S9. There are primarily four ways in which you can take the screenshots. These are the Button combo screenshot, the Palm swipe screenshot, the Scrolling capture and the Bixby Voice.
Button combo screenshot
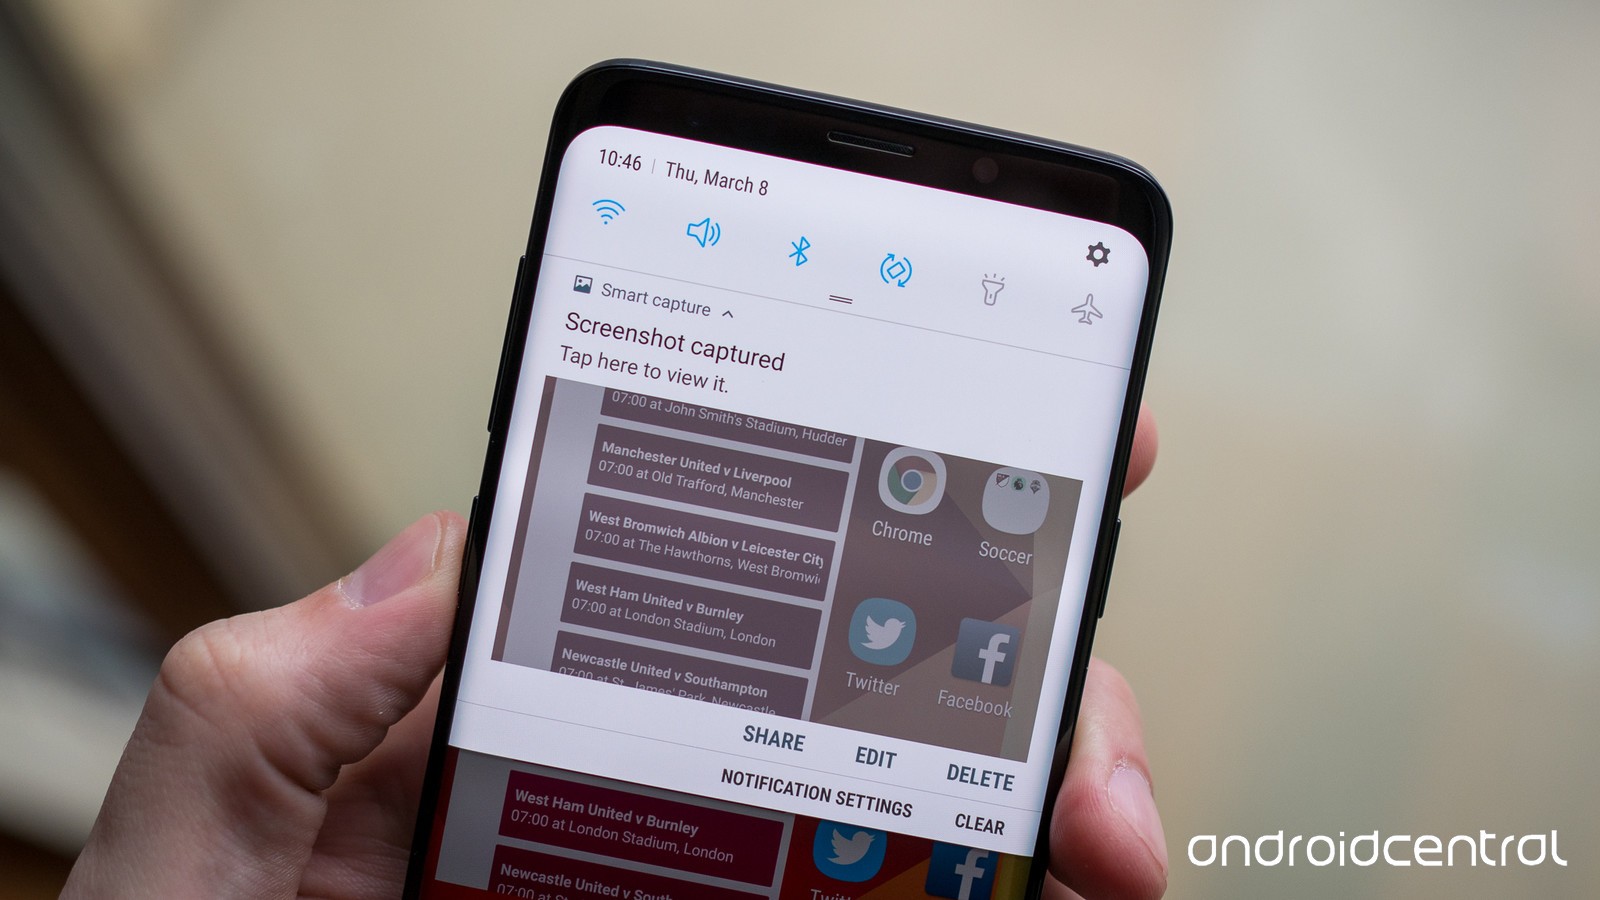
Out of all the ways that are available to capture the screenshot, this particular way is the most simplest. Most of you reading this might be familiar with the way. you simply need to open the photo or the content on the screen of which you want to take the screenshot. Next you need to press and then hold volume down button plus the power button simultaneously for around 2 seconds. You will observe that the screen shrink in, and there are these editing options that appear briefly on your screen. these options let you edit as well as share the screenshot right away. In case you miss out on these buttons then you will find that the screenshot is saved in the notification shade.
Palm swipe screenshot
Another way to take the screenshot is making use of edge of your hand so as to swipe across and then activate the process. You need to go to the Settings and then on Advanced features . Here you need to make sure that the “Palm swipe to capture” is activated. Now you need to open the screen where you need to capture the content in screenshot. Next you need to place the side of your palm on the edge of your screen. Now in one go you can swipe it across the face of your phone. Rest of the process is similar to one that has been mentioned above.
Scrolling capture
If you go in for capturing the screenshot using the button combination or the palm swipe, you will always notice that there is an extra option available in the bottom edit bar that says, “scroll capture.” Using this option you can automatically scroll as well as stitch together a plethora of screenshots in just a single super-tall screenshot. You need to get to the content that you wish to capture. Irrespective of the app that you have, it must be able to scroll vertically which is a must to begin with this process exactly at the top of content to be screenshot because the scroll always goes only downward. You can go in for using the button combo or palm swipe to take the screenshot. Now you need to tap on the scroll capture present at the bottom of the edit menu of your screenshot. You can carry on doing so unless you have captured everything you want to. The extra-tall scrolling screenshot that you take get saved in the same way like other screenshots do.
Bixby Voice
Sometime you are unable to fetch your phone to go in for button combinations or swipe gesture to take the screenshot. In this way the Bixby Voice comes to play. Firstly get to the screen where there is content that you want to capture. Next you need to press a well as hold the Bixby Button. In case you have already configured it then you just have to say, “Hey Bixby.” All you need to say is “take a screenshot,” the screenshot gets saved like otherwise. In this case, you however need to consider that this way does not allow you to edit the screenshot taken immediately.
All in all, these are the steps to take screenshot on Samsung Galaxy S9. In case you have Samsung Galaxy S9 then you ought to know this.